Have I been lazy about working on the Tattoo Shop? Yes.
Have I changed my mind 1000 times since my last post? Yes.
Did I have to start from scratch because I forgot to open the hole for the staircase and was not able to make a clean cut on the MDF, just because I glued the MDF panels together before making the cut, so that the cutting tool won't fit anymore, causing me to mess it up? Yes.
So after all that drama, here comes my way overdue update for the Tattoo Shop...
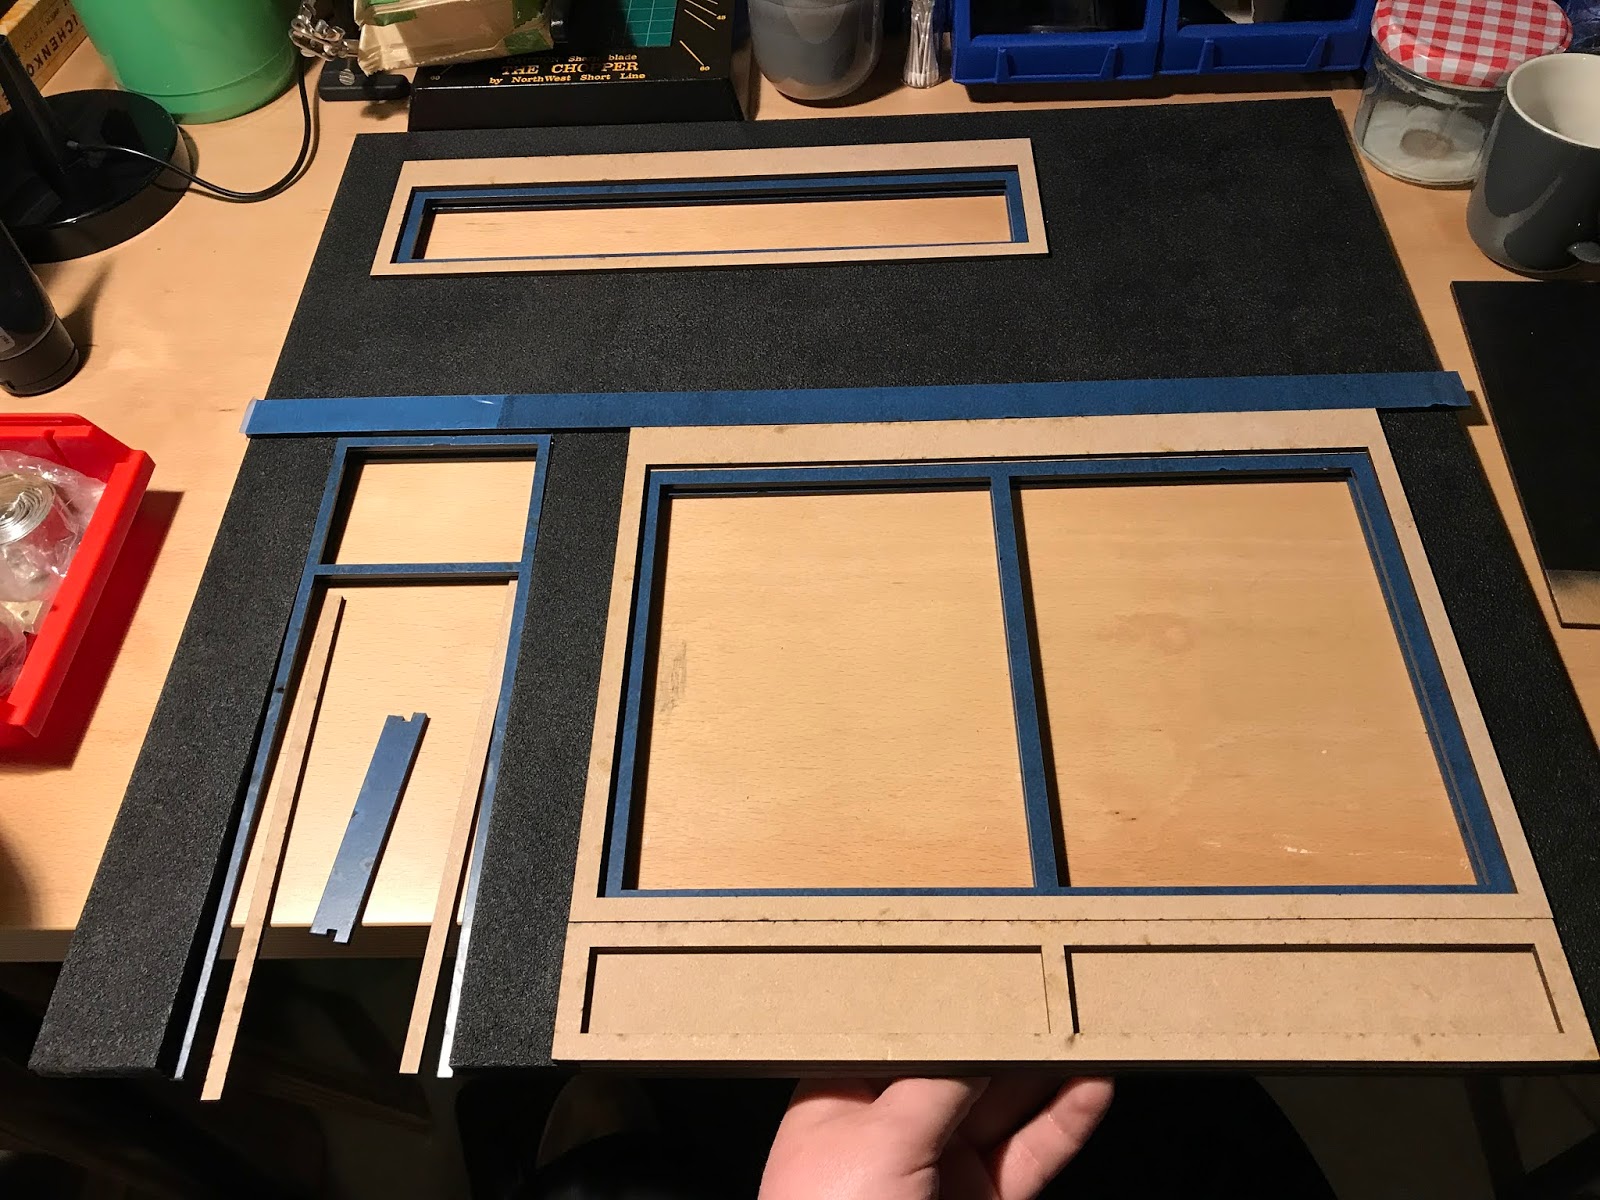
As already mentioned, I made some adjustments to the basic cuts and decided to move the stairs from the left side to the right, adding as well a little toilet upstairs. The windows upstairs have been moved to the left.
 |
| Previously |
 |
| Now |
In order to add some texture to the wall, I cut a very thin cork sheet into brick shape and glued them in a brick pattern onto the wall. I then painted the bricks and some parts of the walls in white. For the remainder I used the color "Palmtree".


Once the walls were ready, I started working on the floor. For this, I had bought two beautiful "Antique Dark Oak" floorboard prints from Susan Bembridge Designs. The floorboards are printed on high-quality photographic card, which makes them extremely detailed. As I did not want to risk the card getting waves with
a wet glue, instead of gluing the flooring with a PVA glue as recommended in their guide, I decided that this time I'd use a very strong but thin double sided tape. This was a good idea - a very good idea! I started with adding a layer of tape to the ground.


Then, I placed the flooring on top and started to take off the protective film of the tape piece by piece. I first stuck the floor from the center to the right, then came back and finished the other half. This way I could advance step by step and could ensure that the flooring is sticking perfectly onto the tape, without any air bubbles or wrinkles.

Once the flooring was fully attached, I trimmed the excess with a utility knife.


Then I started working on the flooring of the little toilet. I used left over tiles and painted them in white, then applied two coats of glaze.


Next a quick dry fit of the stairs and the counter...


I also started adding the beams on the ceiling, but more on this on another post...

In the meantime I got a bit distracted, as I had so many ideas for the store front. Therefore I decided that I would stop working on the rooms and first finish the front instead; that way it would be out of my mind and I could fully focus on the interior again.
I started with applying a self-adhesive textured plaster onto the MDF. It dries pretty fast and is very easy to apply.

Once dry, I colored the plaster in black and did a first fitting of the laser cut windows and door frames, which I designed to perfectly fit the openings on the front MDF panel.
To this, I added realistic looking acrylic windows, also laser cut at snijlab.nl.

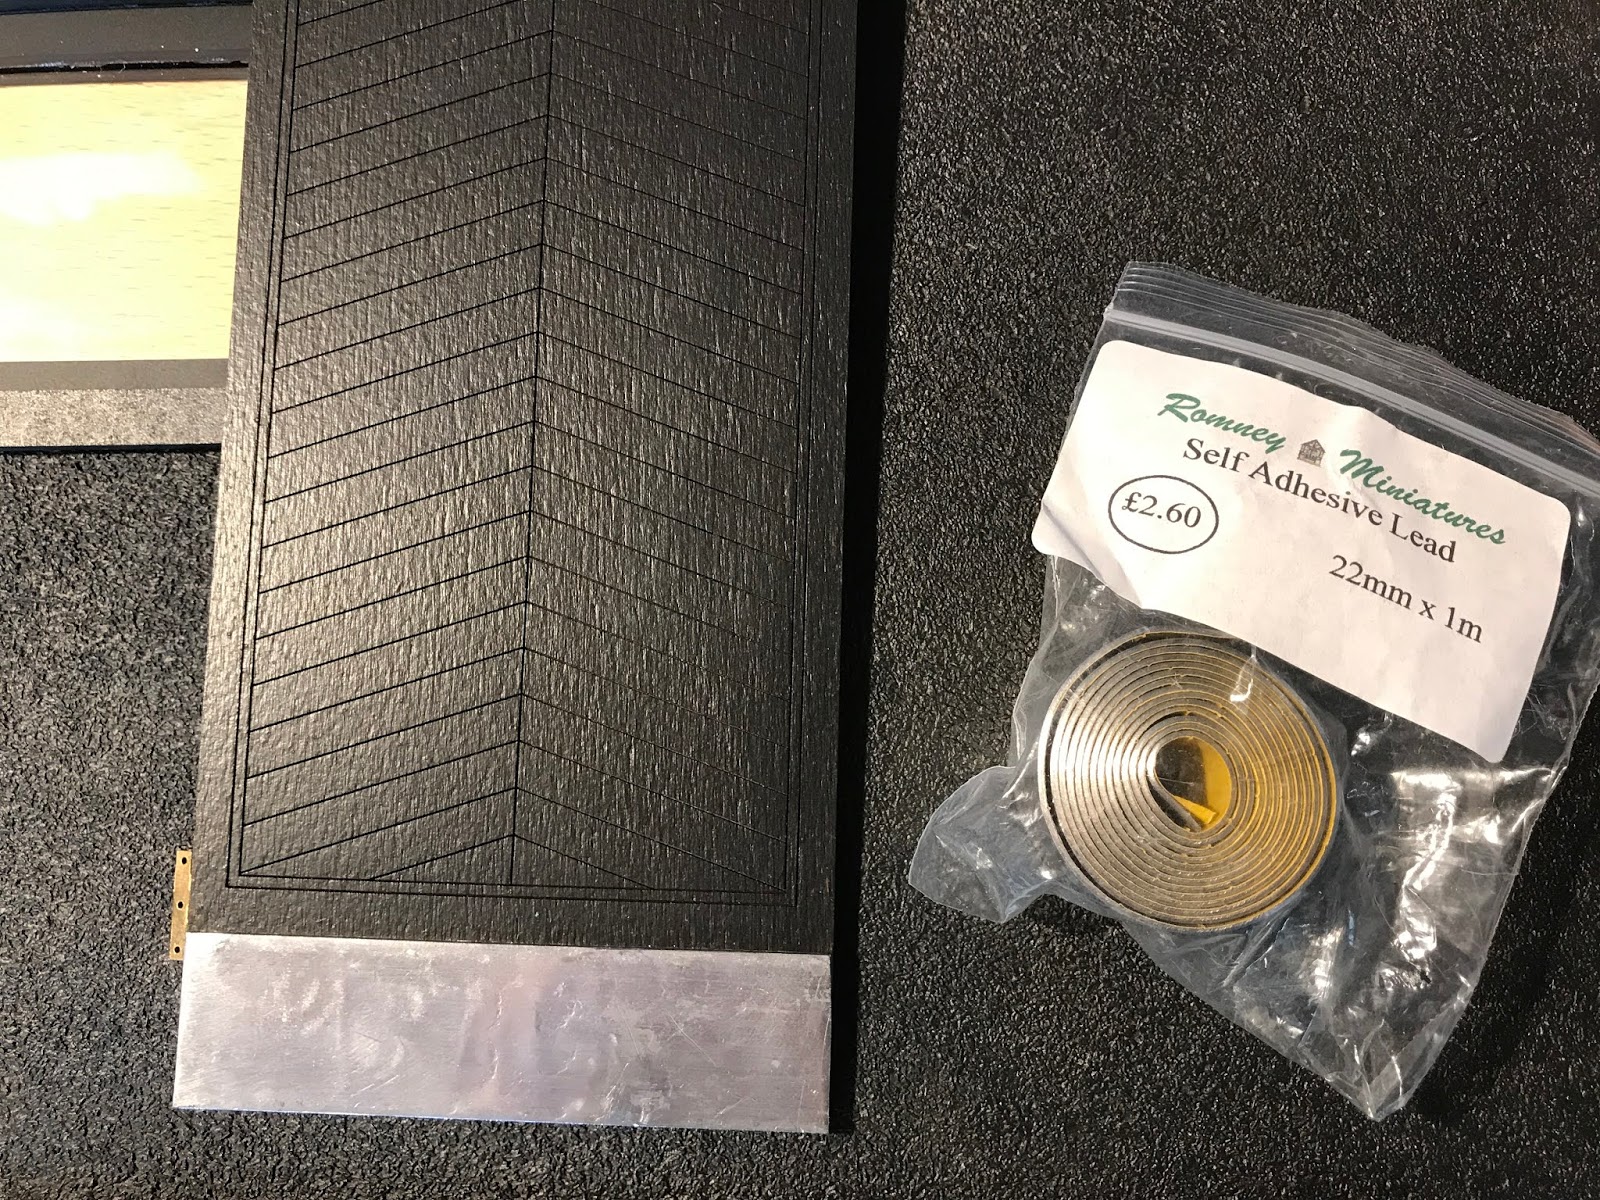
Once all was set and glued, I started working on the front door. I first airbrushed the door with a semigloss black color and added hinges. Then pasted a self adhesive lead strip on the front side of the door.

This all looked too clean to me, therefore I created a "rusty" look with some acrylic color. I also white washed the door in order to give it a weathered look. For the white wash, I just took a tiny bit of white acrylic paint and mixed it with lots of water, eventually adding some other colors for additional shades.

Then I painted some mesh wire in black for the window on top of the door, and cut some other pieces for the bottom of the larger windows.


I also white washed and weathered the entire front of the store with acrylics and weathering powders.


I then made some research on store signs and chose a couple alternatives. I printed the sign that I chose onto normal printing paper with a laser printer in order to later on make a transfer onto wood. As you will have to glue the printed side on the wood, the text has to be reversed.

I used Mod Podge to glue the paper onto the wood for the transfer. I let the glue dry fully, this way it is less likely that you will lift some of the print from the wood. Then I dipped my finger in water and rubbed the paper off of the wood. The printed image / text stays on the wood.

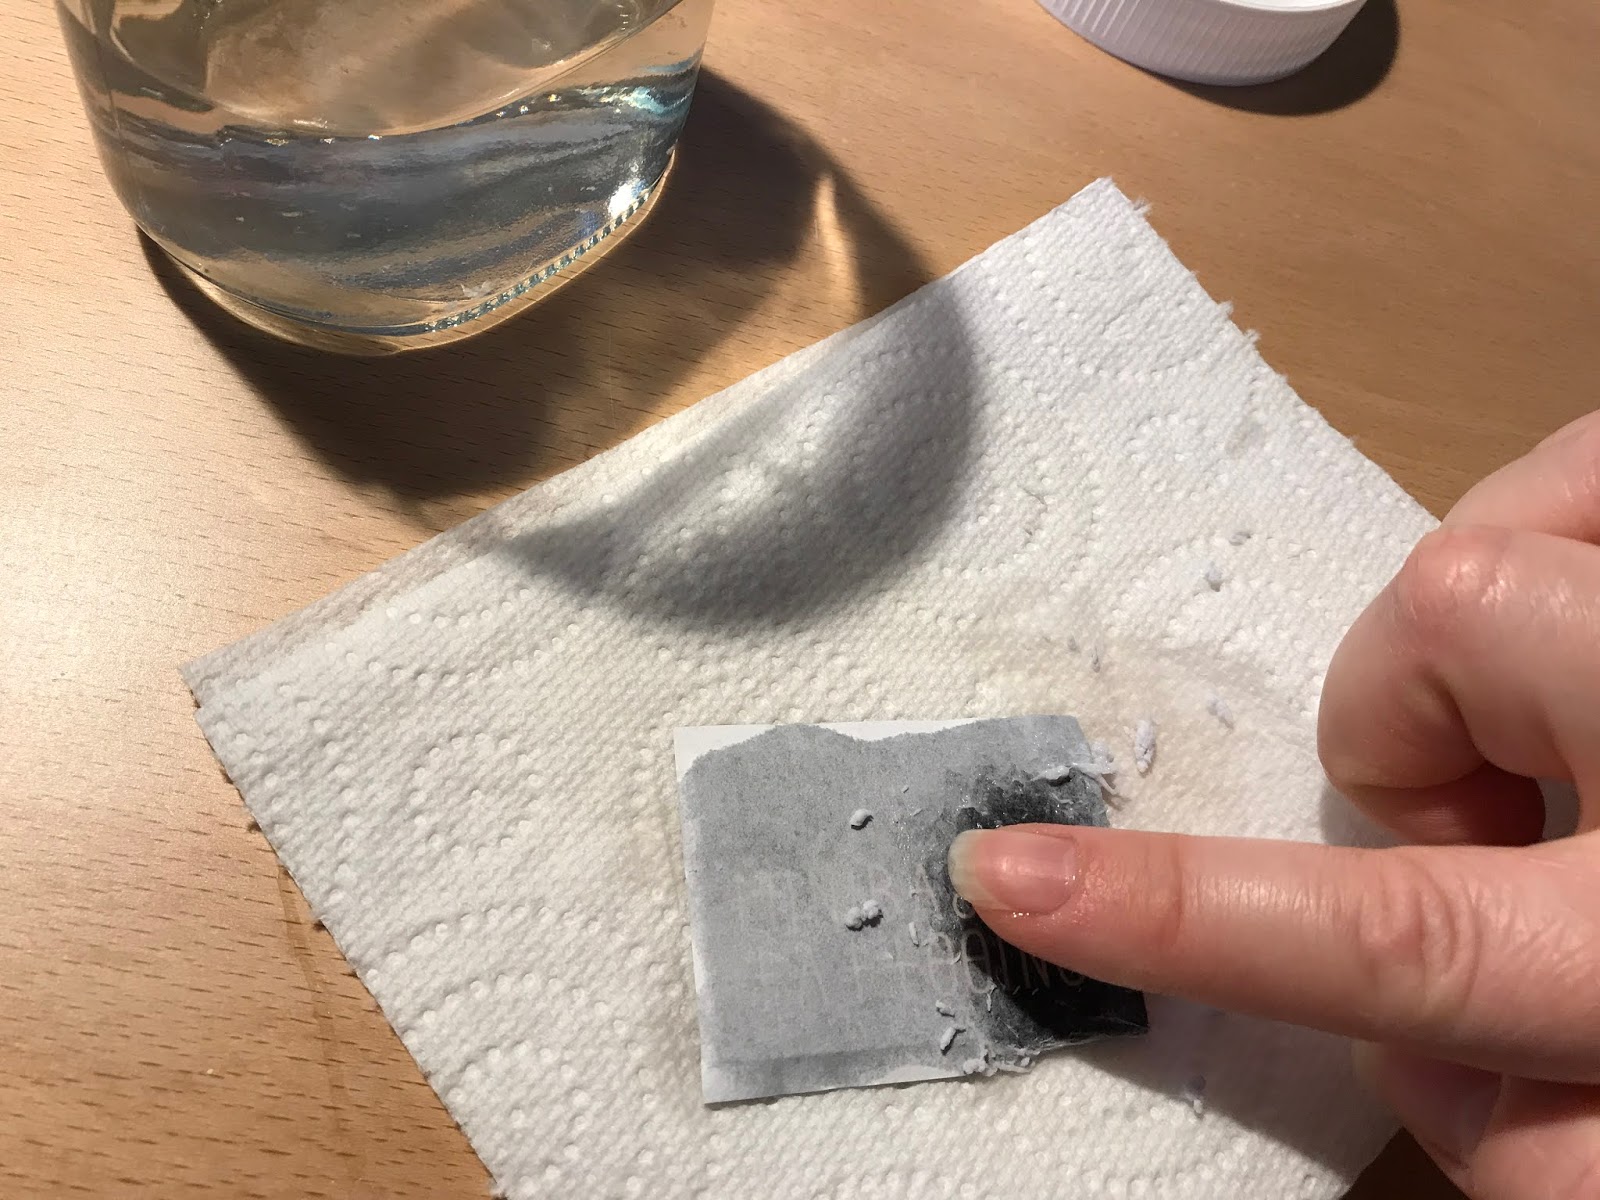

Dark colors do not transfer very well, as you can't really get 100% of the paper off of it. You will get a better result if you would just transfer a black text on a white painted wood piece. For this sign I helped it a bit, by enhancing the gray areas with black acrylic paint (The paint is a thin airbrush mix with distilled water and glycerin).
Before I show you how this turned out, do you remember when I posted about the colored led stripes?

Well, I finally got to install them on the windows as well!


I hope you like this build so far. Here you also get a most recent view of the interior: Stairs and counter are finally placed in.

There are still some things to do with the basic build, then I'll start with the electricity.
I also wanted to share this picture from my walk the other day. The sky was so lovely, I thought you might like it!

Have a great weekend and keep safe my friends!
Hugs,
Susi
Your tattoo parlor looks perfect! Thanks so much for sharing your progress and techniques. I especially like the way the LED strip lights look.
ReplyDeleteWow! I love how it looks. The black is great. But my favorite are the signs and the led color outlining the windows. Perfect!
ReplyDeleteLooks fantastic!
ReplyDeleteMarilyn
Maravilloso!!! No puedo esperar a verlo terminado; ya sin decorar se ve impresionante, felicidades!
ReplyDeleteFantastic amount of detail already Susi...the front door, the graphics and I love the EL Wire neon around the windows. It all looks amazing!
ReplyDeleteLa fachada se ve genial y el resto va por buen camino.
ReplyDeleteThe facade of your tattoo parlour with the neon lights and rusty kick plate on the door as well as what's going on in the interior- is all looking Pretty Darned Impressive!
ReplyDeleteThe changes and progress are so neat and worth the wait for this captivating post! I love all of the elements, Susi! As always, your ideas and methods are so original and out of the box that I leave awed and inspired! Can't wait to see more progress!
ReplyDeleteHi Susi! Sorry, for being so late, but as since I'm forced to use the new blogger version my readers list is acting odd: often no updates of new blogs of followers, or two days late and so on :(. So, after reading your comments I was now searching for your blog (whilst I'm still a follower of your blog! How comes...??) for visiitng/leaving you here a comment. Well, having said that....I hope I'll succeed.
ReplyDeleteI think that your find for making bricks out of cork sheet is very inventive, I've never thought of this. I also didn't know that Susan Bembridge also makes floor paper, so I've learned a lot of you in this blog post ;).
The color scheme you've chosen for this house is really gorgeous, exactly my taste, so I love it.
You really achieved alot of work, inside and outside. The facade has a very realistic look, it looks just like a real life Tattoo Shop. You've thought for adding of the tiniest detail! Thank you for the link to snijlab.nl, I've (again) never heard of. The door (including the perfect sign) and windows add even more realistic look to the facade, also because of the colored led strips and the ads on the window glass, true craftmanship!!
Thank you for sharing your progress and how-to's, Susi.
Blijf gezond, zorg goed voor jezelf!
Groetjes,
Ilona