Showing posts with label Tutorial. Show all posts

May 1, 2019

More steps...

Since my last post I've been working on another small project for the tattoo parlor: spiral stairs! These are my first spiral stairs ever, so there has been a lot of learning by doing for this one.

First I looked up standard spiral stair dimensions on the web and decided how wide and high every step should approximately be. I chose the radius of the stairs to be 7 cm, and using a pair of compasses drew a curve on the wooden pieces.


I used the end of the curve on the longer side of the triangle as a guide when sanding, to give each stair a round edge.


Next, I used a piece of the center column to mark the tips of the steps and used my Dremel tool to sand them down to exact shape. This way I wanted to ensure that the steps wrap the center column perfectly when gluing.

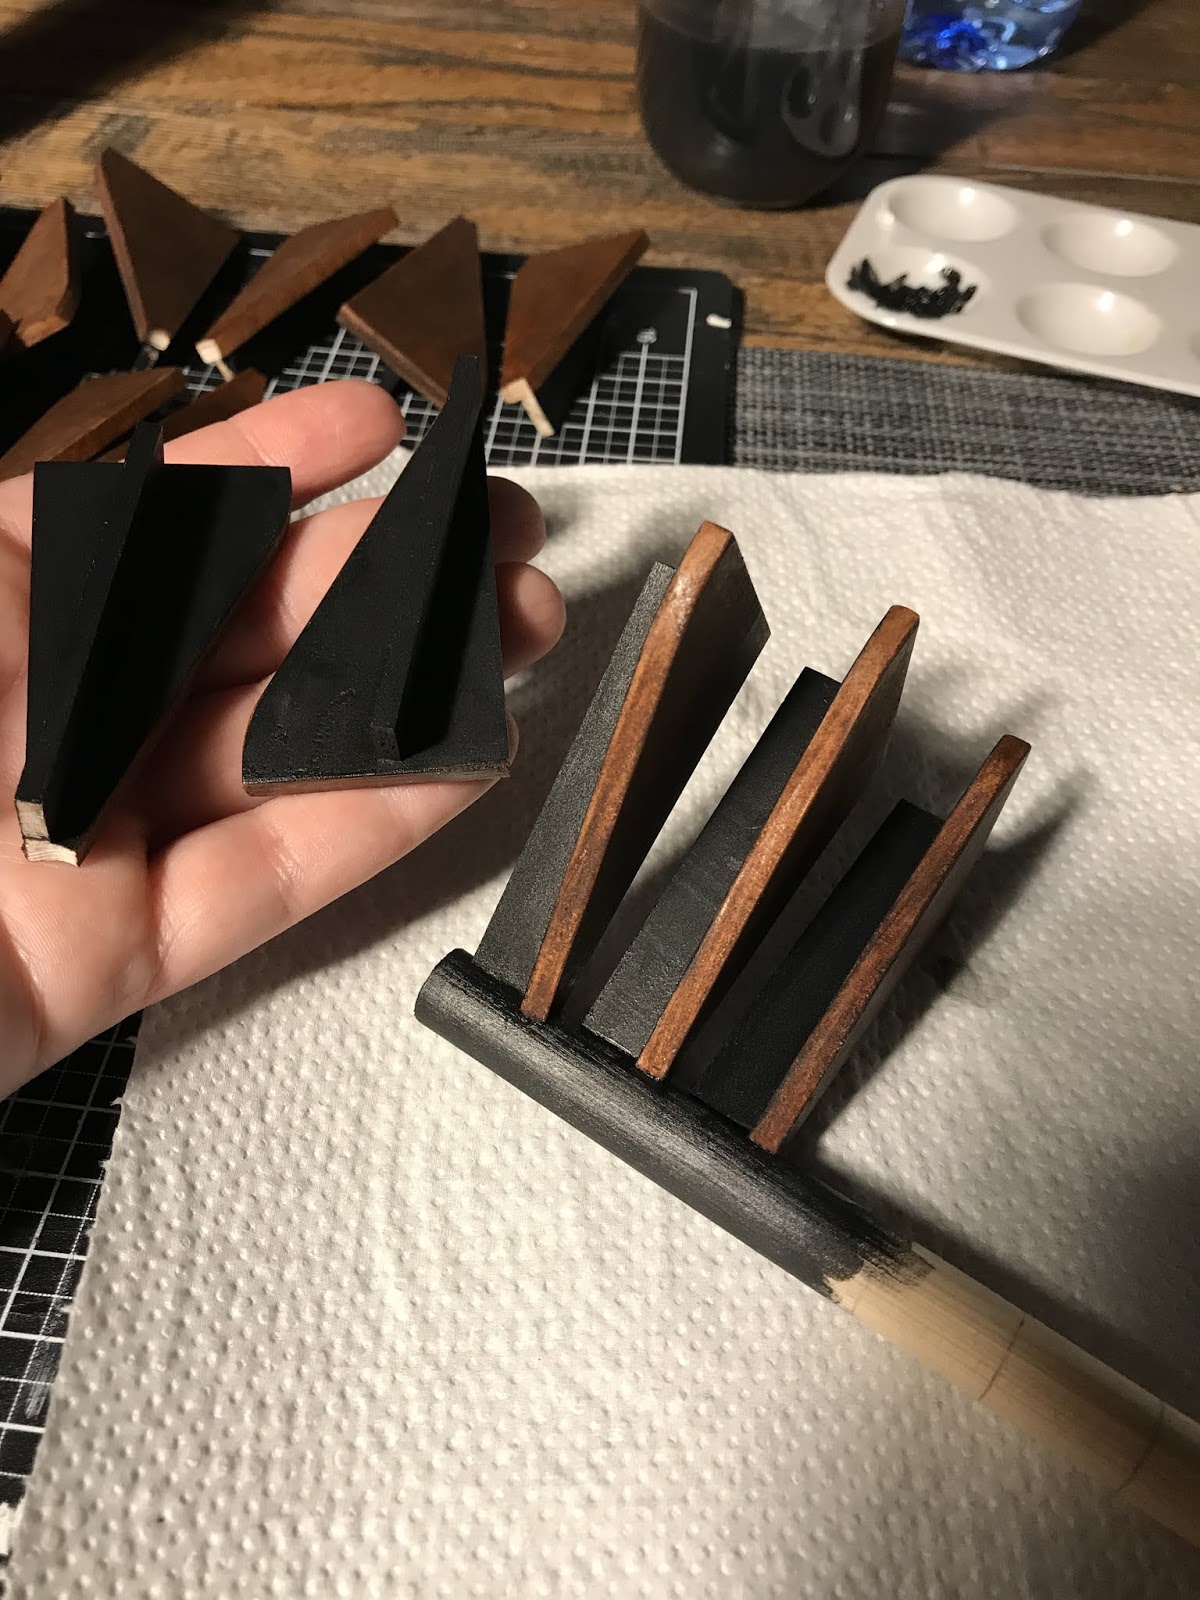
Then I used some leftover window frame pieces from older kits, cut them to the size of the shorter radius side of the triangles and glued them to the lower side of each step of the stairs to look like supports.


I marked each step at the same place on the outer border, to know where to place the supports when gluing them, which helped me achieving a standard look. I also marked the column for the placement of the steps.


I tried a couple of paints for the steps but was not really happy with the results. Finally, I mixed some dark varnish, transparent varnish and orange and red pastels to get a softer color. I only painted the upper side and the upper edges of the steps with this color, the lower parts got painted in acrylic black for a mat finish.


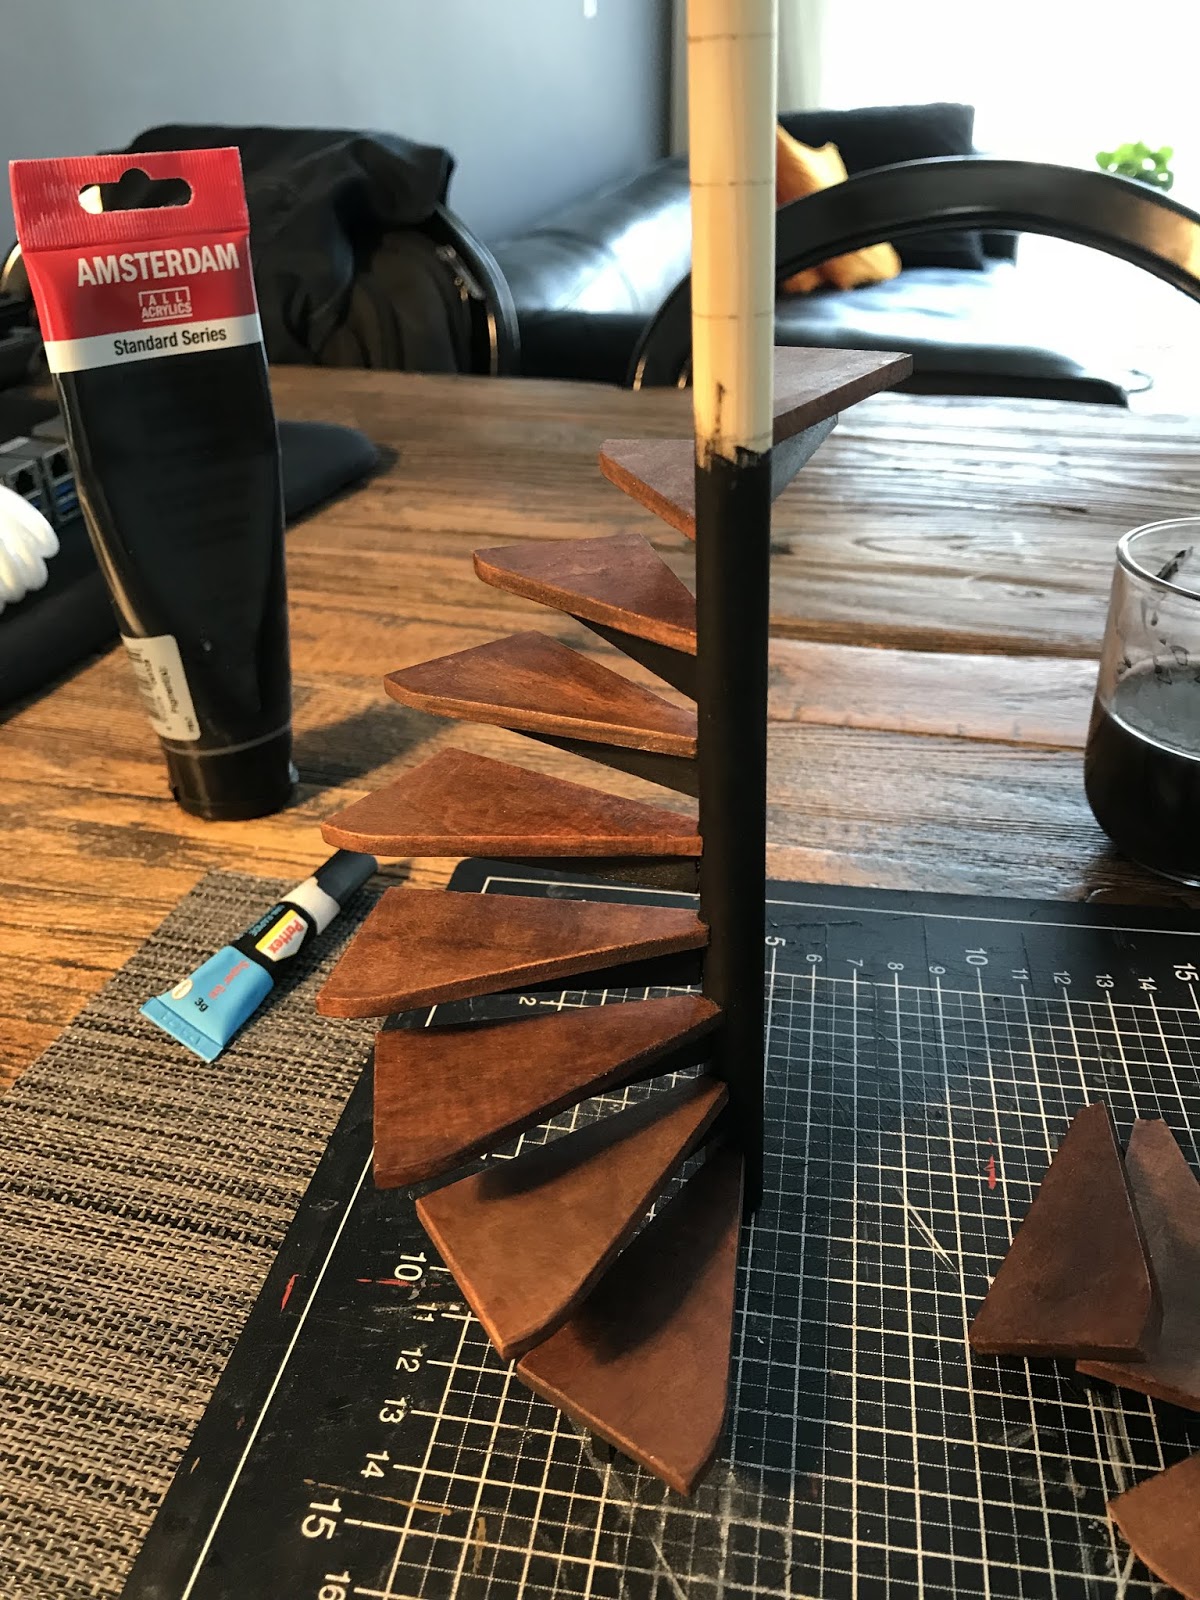
Once the varnish/paint was fully dry, I started gluing the steps one by one on the column, ensuring that each step keeps the same distance to the previous one. After each step I painted the column in acrylic black, which also helped covering any glue marks.


This felt a bit like building a house of cards to be honest...


And voila! Done. I must admit I'm pretty proud with myself at this point, because this felt like something impossible to do at the beginning, but turned out being pretty straight forward in the end.


I hope you like the stairs and hopefully this post will help you build your own spiral stairs. If you have any questions let me know, I'd be happy to help.

Good night!
Susi

March 10, 2019

Little by little!

Step by step I started to work on the tattoo parlor in these past weeks - thank you for all your comments on my last post, they gave me a great boost of motivation! 

I finally managed to Inkscape-draw the outlines of the tattoo parlor and to send it for laser cutting to snijlab.nl. This time I decided not to try adapting to a kit, but instead to create exactly what I wanted. The end result is better than I expected:


I made a lot of juts and openings in the walls and base of the building, so that there is an extra support when I glue them together. I added some pasteboard to the bottom of the base, first of all to make it smoother, so that I don't end up scratching all the surfaces I put the building on, but also to ensure that the pieces I will put on top don't slide past the openings.


Once this was done, I assembled the pieces and glued them together, except the front wall and the roof, which are going to be removable.


You can already see how the building will approximately look. Of course the door is missing, as well as the huge windows. I will also have to add the stairs that lead to the upper level.


In the meantime I was also working on a workstation for the tattoo supply. I started with a polystyrene sheet and marked the pieces I wanted to cut out. Sorry for the quality of the pictures - we still have to install all the lights in the house!


Once I cut all the pieces, I glued them together with some extra thin cement for polystyrene. It glues very fast so the workstation got assembled pretty quickly.


 Once I glued all parts together I sanded all sides to get rid of any misalignment.


Then I cut long strips for the front corner sides of the workstation and thinner strips for the drawers. (Sorry to disappoint, but this is going to be just a "fake" workstation, without functioning drawers.)


Once the fake drawers were in, I needed to choose the wheels and I remembered that I had bought some from the DHN Show in Arnhem in 2018, but when I found them I was pretty disappointed by the small size of them, compared to the workstation.


I looked some wheels up online, but they were either too expensive or not in the size that I needed them, so I ended up doing some on my own. I baked some back polymer clay, rolled it to the desired size of wheels.


Then I cut it into individual roller, sanded them, and hand drilled a little opening in the middle.


To attach them to the workstation, I cut some tin sheet into strips with a curve on each and, bent them over a wooden piece and drilled a hole on the middle of each of the curved ends. (I used the first hole on the wooden piece as a guide to where to drill the hole on the next piece.)


Once the tin pieces were ready, I combined them with the rollers, by putting a very thin nail through the holes and clipping off the excess on the other side. I first thought to secure the headless end of the nail with something, but the roller keeps in place surprisingly well and also turns surprisingly well I must say. I think the trick was to keep the drilled hole a bit smaller on the roller so that the nail is almost "attached" to it. And ta-daa! Here are the wheels.


The headed side of the nails are meant to face away from the workstation when attaching the wheels on the workstation for a better look.


Then of course I had to paint the polystyrene and I knew that normal paint wasn't going to do it. As a result, I forced myself to try something new and paint it with enamel, despite of all the "danger" messages that come with it. I opened all windows and doors and started painting in the cold. To be honest, at the time I had the first layer of color on the workstation, I understood why many people might want to go for spray painting instead of painting with a brush, in order to get a more equal distribution of the color. Some places ended up having a thicker layer than others and when I continued with the next layers (for which I had to wait at least a day), then you could still see some of the brush strokes, which I hoped not to have with enamel. There it is, another thing noted on the list: "Try spray painting" - anyone who can give me some tips on that?


Once the layers of color were all dry, I glued the wheels with some all purpose super glue on the workstation. This worked miracles. I always had a very bad experience when gluing tin to some other material and at this point, I had already thought for 4 days about how to attach the wheels on the workstation! But when gluing on polystyrene, there seems to be a different chemical reaction and to my surprise the tin of the wheels bonded really strongly with the enamel covered polystyrene. This was such a joy that even the coldness of the room did not bother.


Finally I enamel painted also the drawers to match the look of the workstation to the real deal. I'm pretty happy about how it turned out to be honest.


It has been over a year since I had chosen the color palette that I wanted to go with for this build. I realized that I actually want something more out of the ordinary. Here is what I initially had chosen:


But for some reason this feels a bit like a home decoration to me now, so I changed the greys and browns with black and orange - yes, orange! And to top it all, I thought why not green as well! Given that this is going to be a tattoo parlor, it has the right to be a bit more aggressive. Here is approximately the colors I will have, with the addition of some redder orange.


One of the next things I'll work on will be to create the tattoo table and a sofa for the waiting lounge. For this I ordered some leather from the USA (Etsy), and it turned out to be beautiful! It is very thin, approx. 1mm thick, which will allow me to easily wrap the pieces of the tattoo table (black) and sofa (green). It's always a bit tricky when ordering from afar, but the quality of this leather is really good and it smells really nice as well. Below the card from PeggySueAlso, in case you're looking for something similar.


The color in the following pictures is a bit off, seen that it was taken in the evening, again, I had insufficient lighting...


This is all for now folks. Will keep you updated.

Wishing you a wonderful Sunday! - Susi

January 10, 2016

Miniature Record Sleeve Tutorial

Finally some time to spend on minis again! I'm catching up with all the nice Christmas posts on other blogs as I've been traveling to see family during Christmas and New Year. All the traveling back and forth is rather exhausting compared to a relaxed weekend at home. Pff and I hate the laundry when coming back from a holiday, I'm not even talking about the ironing!

Yet, as promised, I did a little tutorial for the vinyl sleeves that you can see in my HBS contest entry. I did not have the thick glossy photo paper to print on though, that I had used previously. The one I used for this tutorial is less glossy and less thick, which makes the record sleeves look less real. I hope you will like it anyway...


I also ordered some new minis during last week and can't wait to receive them. I will share some pictures in the upcoming days. Let me know what you think about the tutorial or if you want me to make one for another item in my HBS entry.

I wish you all a cozy Sunday Evening...
Susi

October 11, 2015

Tutorial - Miniature Headphones

Hi everybody! This has been a very busy week for me, as will be the upcoming week I guess. I'll be traveling abroad for work, so I won't have much time to write during the week. I already feel tired and the cold weather wave that hit the city yesterday, made the hot water bottle my best friend today!

I'm still trying to finish a couple of things on my HBS Creatin' Contest entry but I'll do most of the remaining things next weekend as it involves spray painting and it's cold outside. So I try to do little projects here and there when I find some time. For so long, I wanted to make some headphones inspired mainly by Nunu's House's Headphones and the other blue headphones below.


TUTORIAL - Miniature Headphones

To start with, I chose 2 colors of fimo, black and Indian red (which in the pictures looks more like pink). You don't really need any other thing than that. The only thing you'll need is a kind of a thin cord for the cable.


1) To give the headphones' upper part a round shape, you will need a round object that you can put into the oven. I found it easy to use a glass jar with a diameter of 1,6cm (0.63 inch).

2) Roll your black polymer clay into a 2mm (0.08inch) wide cane.

3) Press lightly and roll the jar on your working mat so that it gets flatter, approximately a millimeter. You do not need the two ends of the can so you don't need to make a complete round.

4) Cut off both ends of the cane, make sure that more than half of the bottle is covered, the edges should be long enough to curve again to the interior. Once you cut off the edges, divide the main body into two equal lines, which should stay connected for approximately half a cm at the edges. Put the glass into the oven when it's still cold (if you put the bottle into the preheated oven, it may break due to the sudden heat increase). Only then turn the oven on and bake it at the recommended heat for your polymer clay for about 15 minutes.


5) Once the main body cools down, take it off the bottle and add to each line, some clay (in your secondary choice of color) to make some sort of padding for the upper side of the headphones. I made little lines on the side of these to give them a more realistic look. As the cooked piece will be very smooth due to the fact that it was baked on glass, the extra clay may not stick well. I used some instant glue to fix the fresh clay to the main body. Bake this piece for another 25 minutes.

6) Using a cutting tool, make two circle pieces of approximately 1 cm of diameter, and two circles that are slightly smaller. These 4 pieces should be very fine, the ones I made are roughly thinner than 1mm. Also make 2 rectangular pieces which may be a little thicker approximately 0.5 x 0.2 mm. Bake these.

7) Glue the rectangular pieces on the both outer ends of the head piece.


 8) With your cutting tool, cut out again 1 cm wide round pieces of your second clay, which should be a little thicker than 2mm.

9) Shape these in form of ear pads with a hole in the middle. As before, I made lines and cracks on the sides as well as on the body to give it a more realistic effect. These pats should be flattened a little so that they become slightly larger than the black circles that were prepared previously.

10) Glue the smaller circle on top of the bigger one, then the ear pad on the other side of the bigger circle. I used instant glue for this again, please note that instant glue sticks extremely fast with polymer clay, so that once you put your pieces onto each other, you won't be able to move them much further to replace them. Keep calm and try to fit these in one shot :)

11) Once the ear pieces are ready as well, glue the ear pads onto the upper piece onto the edge of the rectangular pieces you previously had glued.


12) You're almost there, but you still want your headphones to look technically accurate, therefore they need a cable. I used some electrical wire that I usually use to wire a dollhouse by dividing it into two. As my wire was white, I painted it into black with some black aquarel color. I preferred to use an electrical wire, as I was able to cut of the end of the cable, to make it look like a jack.

13) With a needle tool, try to open a little hole between the black circles and the ear pad where you can squeeze the cable in. Put some instant glue onto the end of the cable and glue it in the little hole you made.

14) VoilĂ ! You're done, your very own miniature headphone is ready to rock your ears!

Let me know if you have any ideas how it could be made better. I hope you enjoy :)   - Susi